Indoor Power Meter - Stages Indoor Power Meter Gen. 3 User Guide
Power Meter Installation
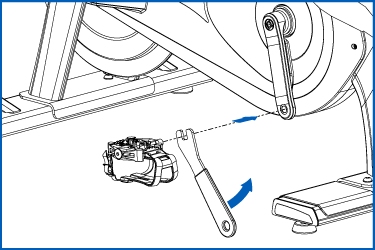
- Remove the left (non-drive side) pedal using a pedal wrench (turn clockwise to remove). *Skip to step 2 if no pedal is installed, or step 3 if no crank arm is installed.
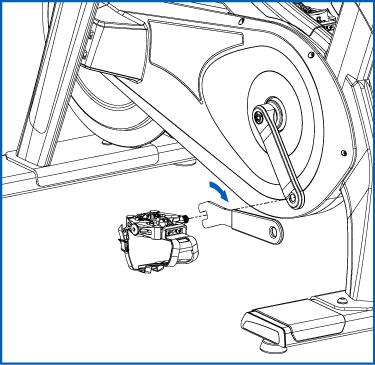
- Remove the left (non-drive side) crank arm using an 8 mm hex wrench.
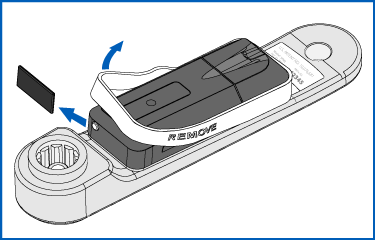
- Remove the rubber band surrounding the battery housing on the power meter and the plastic spacer between the band and the reset button.
- See TSB 05122023 – Indoor Power Meter Battery Compartment to determine if additional steps are required for the battery installation.
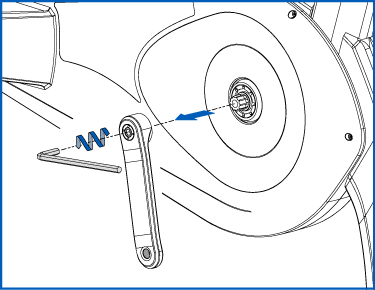
- Install power meter to the specified torque (52-57 N·m) using an 8 mm hex wrench.

- Install pedal to power meter crank arm (turn counter-clockwise to secure). Thread the pedal by hand as far as possible to avoid cross-threading.