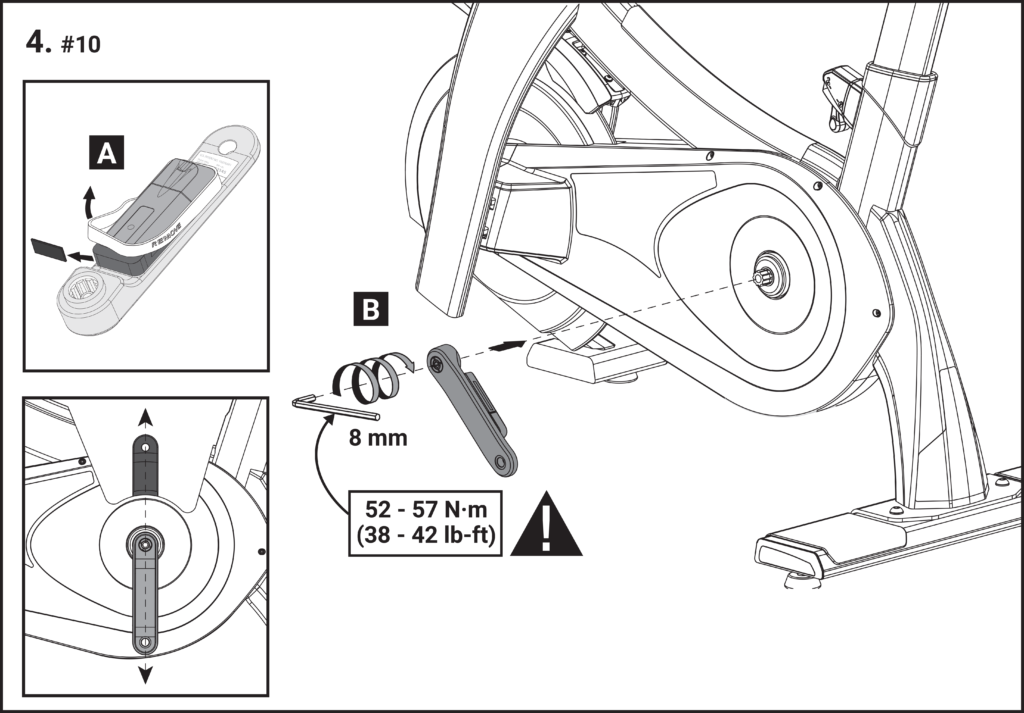
Line up the power meter (#10) onto the exposed splines of the bottom bracket, ensuring that the power meter is parallel to the user-right crank.
Carefully begin to thread the power meter onto the bike. Using an 8 mm hex wrench, tighten to a minimum of 52-57 N⋅m until there is no visible gap between the crank arm and the bike.
WARNING: If not installed to the proper torque, it is possible for a crank arm to become detached while riding. For maximum safety, please follow the instructions precisely to tighten the crank arm fully onto the bike. Periodically check crank arm torque as a part of the maintenance routine.