Visit Stagesindoorcycling.com
Get Support
SEARCH RESULTS FOR:
"
term
"
English
Stages Solo & Les Mills Virtual Bike - Stages Solo / Les Mills Virtual Bike User Guide
Stages Solo & Les Mills Virtual Bike
/
Stages Solo / Les Mills Virtual Bike User Guide
/
Assembly
/
Step 14: Reinstall the nose cap
Warranty Information
Maintenance
Troubleshooting
Contacting customer service
Riding the bike
Emergency brake
Fitloc adjustment
Adjusting resistance & using SprintShift
Handlebar fore/aft adjustment
Handlebar height adjustment
Saddle fore/aft adjustment
Saddle height adjustment
Toe clip adjustment
Assembly
Step 19-20: Plug in the bike & tablet setup and pairing
Step 18: Level the bike
Step 17: Remove the rubber band from the power meter & Install the pedals
Step 16: Install the tablet to the mounting arm
Step 15: Install handlebars
Step 14: Reinstall the nose cap
Step 13: Secure the tablet arm assembly
Steps 11-12: Extend and connect the cables
Step 10: Insert the tablet arm into the head tube
Step 9: Pull the coiled cable down from the tablet arm
Steps 7-8: Lower & secure the gas cylinder
Step 6: Remove the nose cap
Step 5: Install AC adapter cover
Steps 3-4: Mount AC adapter & plug into bike
Steps 1-2: Install front & rear stabilizers
Box contents
Unboxing & assembly video
Tools required
Bike diagram
Important Safety Information
Tablet lift assist
European Union lockout strap warning
Warning decal placement
Safety Footprint
Before you begin
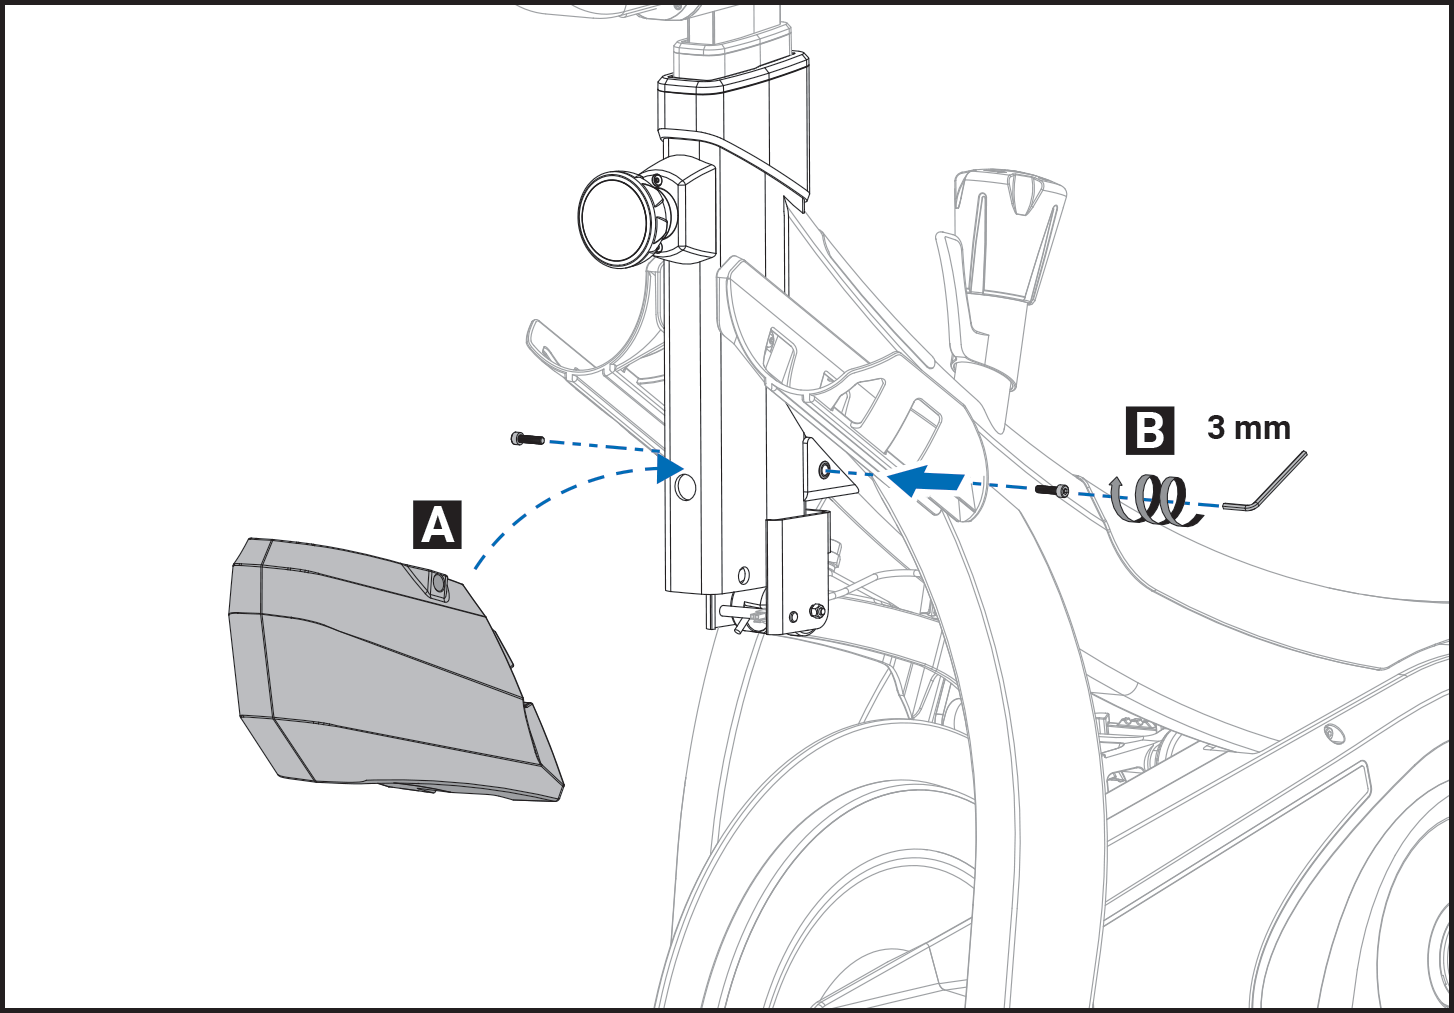
Step 14: Reinstall the nose cap
Reinstall the nose cap, hiding all cables inside.
Place the nose cap over the front of the bike.
Using a 3 mm hex wrench, install the two screws on both sides of the nose cap.
Previous
Next
SEARCH RESULTS FOR:
"
term
"