
IMPORTANT: The console must be paired to a power meter. The console cannot pair to more than one power meter at a time.
To pair the console:
Pairing allows the console to communicate with a power meter mounted to the exercise bike. The pairing process uses ANT+ and Bluetooth Smart wireless technology to link the console to the power meter, with Bluetooth as the priority connection.
IMPORTANT: It is strongly recommended that each exercise bike in a fitness club be numbered for easy identification. To communicate properly, a paired console and power meter must be mounted to the same exercise bike. To make sure that the correct console stays with the correct power meter and exercise bike, you can assign an identification number to the console (see Bike Numbers).
1. Make sure that fresh batteries are installed in the console and the power meter.
See Replacing the Batteries.
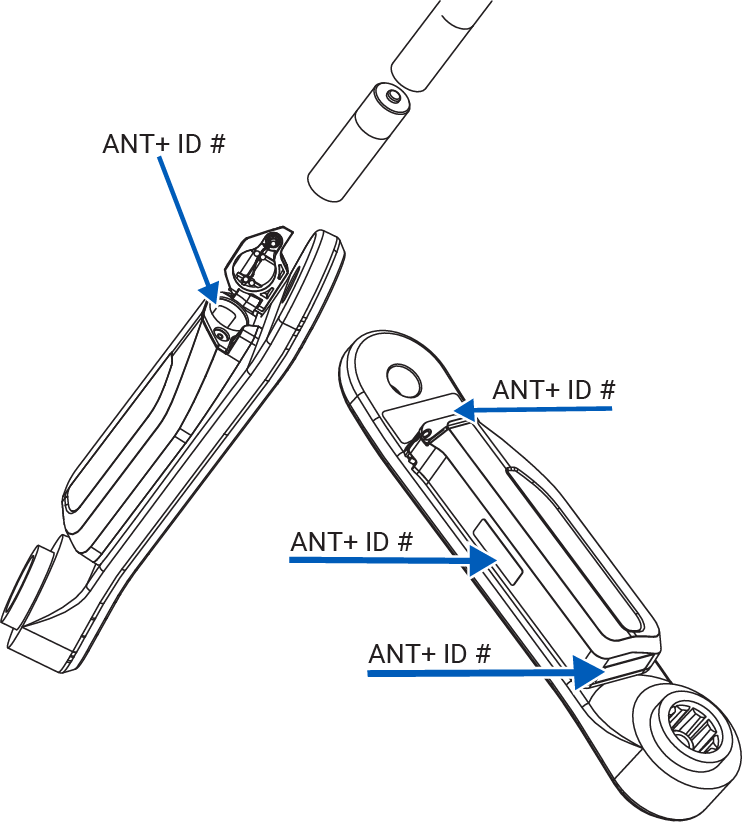
2. Locate the unique ANT+ number on the power meter.
The ANT+ ID number is located in three places on the power meter (below, right), and inside the battery cover as well (below, left).
3. Activate the console by pressing any button, then access the menu by holding down BACKLIGHT and AVG/END buttons for 5 seconds. From the settings menu, select PAIRING. (See System Settings for how to access the SETTINGS Mode.)
4. View power sensor ANT+ ID number: When PAIRING is displayed on the message banner, press the STAGE button. The ANT+ ID number associated with the console will appear at the bottom of the screen.

IMPORTANT: This number must match the ANT+ ID number on the power meter.
5. Begin the pairing process: Press the STAGE button.
ENTER ANT will appear on the message banner. Press the STAGE button. Five digits will appear on the message banner.

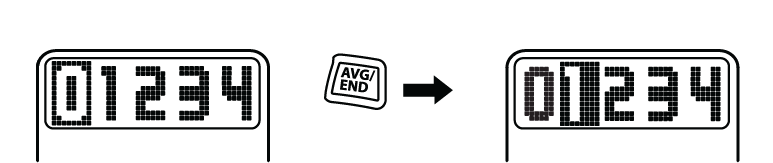
6. Enter ANT+ ID number located on the power meter. Use the BACKLIGHT button to select the number. The number will increase from 0-9 and return to 0. Use the AVG/END button to move to the next digit.
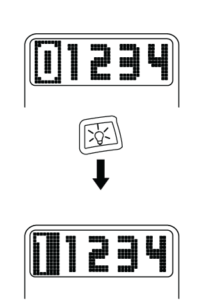
The highlight will move from left to right and return to the first digit.
7. Pairing the Console: When the number matches the ANT+ ID number on the power meter, press the STAGE button to begin pairing. Spin the power meter on the bike. This will wake the power meter and allow the console to link to it.
The console will search for the power meter for 30 seconds.

8. Complete the pairing process. If the pairing process is successful, the word PAIRED will appear in the message banner.

After several seconds ZERO RESET will appear. (See Zero Reset Calibration.)
If the pairing process fails, the word FAILED will appear in the message banner. Go to step 10.

9. Pairing to a power meter without an ANT+ ID label: If an ANT+ ID label is not present on the power meter, it is still possible to pair it to a console.
Repeat Steps 6-8, and enter all zeros as the ANT+ ID number.
IMPORTANT: The console will attempt to pair to any power meter that is awake and transmitting. Ensure that all other power meters within a close range are not awake and transmitting. If the zero reset process is successful, verify that the correct power meter is paired by riding the bike in the WARM UP mode and pedaling the power meter above 20 RPM. If the power meter is paired, a cadence and power should appear on the console.
10. Troubleshoot the pairing process if necessary.
If the pairing process fails, follow these steps:
a. Make sure that fresh batteries are installed in the sensor.
b. Spin the power meter or shake it if it is not assembled on the bike to make sure it is awake.
c. Place the power meter next to the console, so that they are side by side.
d. Make sure that no other ANT+ devices in the area are active. Pair only one console and one power meter at a time.
e. Return to steps 3 to 6 and repeat the pairing process.
